

Creating a checklist
Build a packing list for a specific shoot: pick the gear you need out of your full inventory, then check items off as you pack them and again as they come back.
Creating a checklist
Section titled “Creating a checklist”Creating checklists needs a confirmed email address and an active trial, Gear, or Pro plan; editing checklists you already own stays available on a read-only account. See Plans & billing for what each plan unlocks.
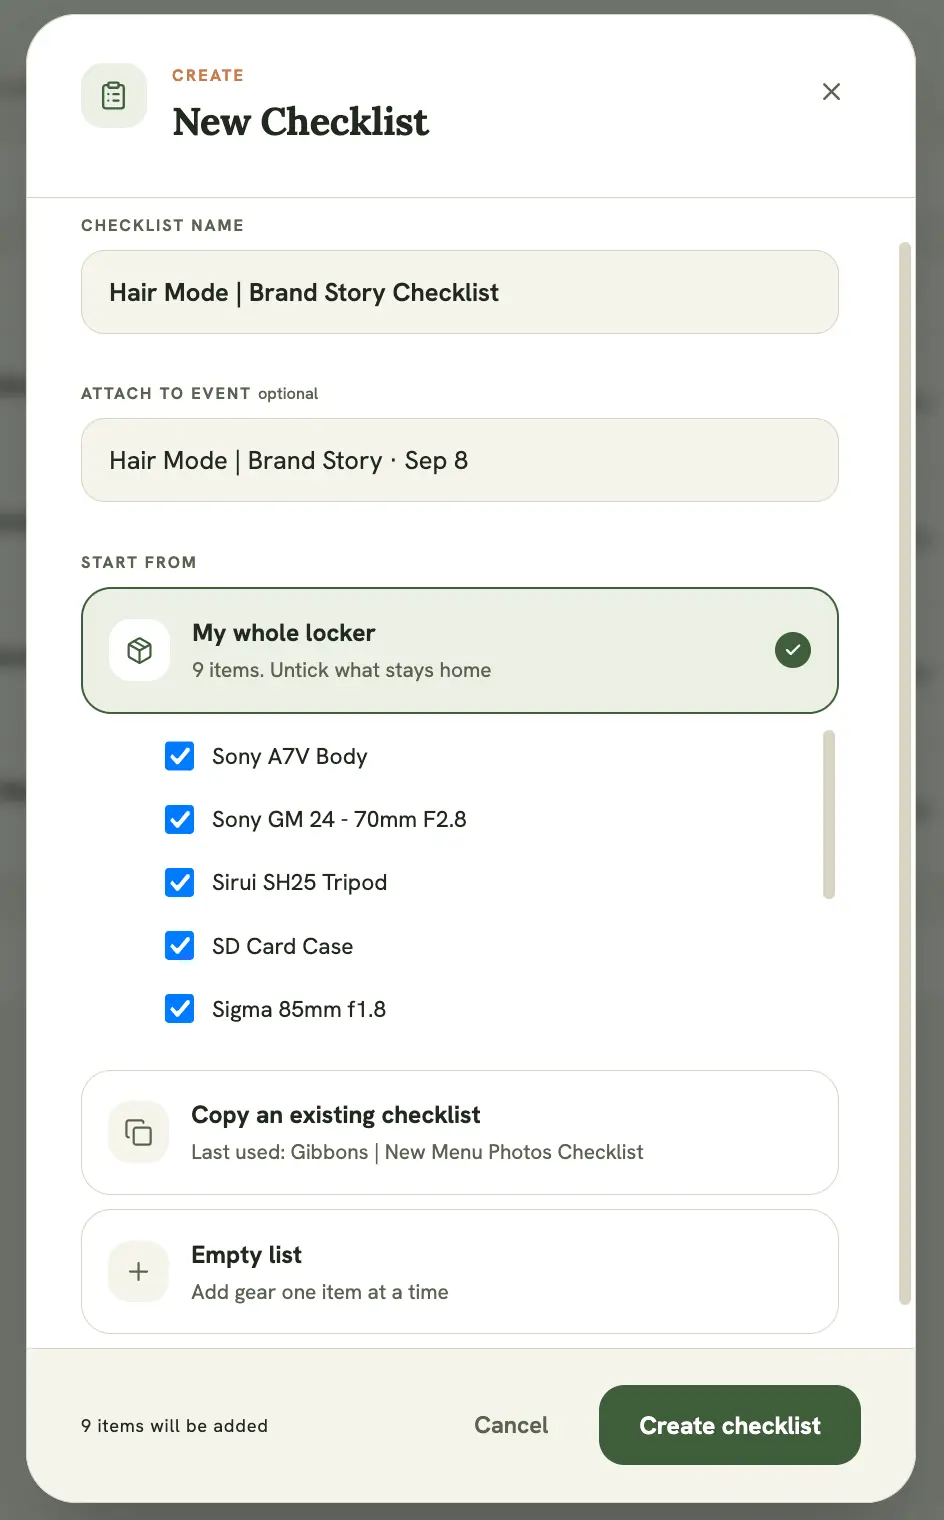
When you create an event, the Create packing checklist toggle (on by default) starts an empty list attached to that event. To create one on its own, or an extra one for the same event, go to Checklists and select New Checklist:
- Enter a checklist name
- Optionally attach it to an event. Picking an event names the list after it and pulls in its date
- Choose what to start from:
- My whole locker — every item in your inventory starts ticked, so you only untick what stays home
- Copy an existing checklist — reuse the gear from a previous list (defaults to your most recent)
- Empty list — start with nothing and add gear one item at a time on the list itself
- Select Create checklist
The footer shows how many items will be added. The new list opens once it’s created.
Editing a checklist
Section titled “Editing a checklist”Open a checklist and select the pencil icon to change its title, shoot date, or notes.
To change the gear on the list, use Add gear on the list itself, or remove an item from its row. Adding or removing gear preserves the packed/returned status of every other item.
Deleting a checklist
Section titled “Deleting a checklist”Select the trash icon on a checklist to delete it. This is permanent and removes all packing progress for that list. Deleting an event also deletes its linked checklist automatically.